|
|
7 months ago | |
|---|---|---|
| assets | 8 months ago | |
| hardware | 1 year ago | |
| img | 11 months ago | |
| teleop | 7 months ago | |
| .gitignore | 11 months ago | |
| .gitmodules | 9 months ago | |
| LICENSE | 9 months ago | |
| README.md | 7 months ago | |
| README_ja-JP.md | 7 months ago | |
| README_zh-CN.md | 7 months ago | |
| requirements.txt | 9 months ago | |
README.md

📺 Video Demo
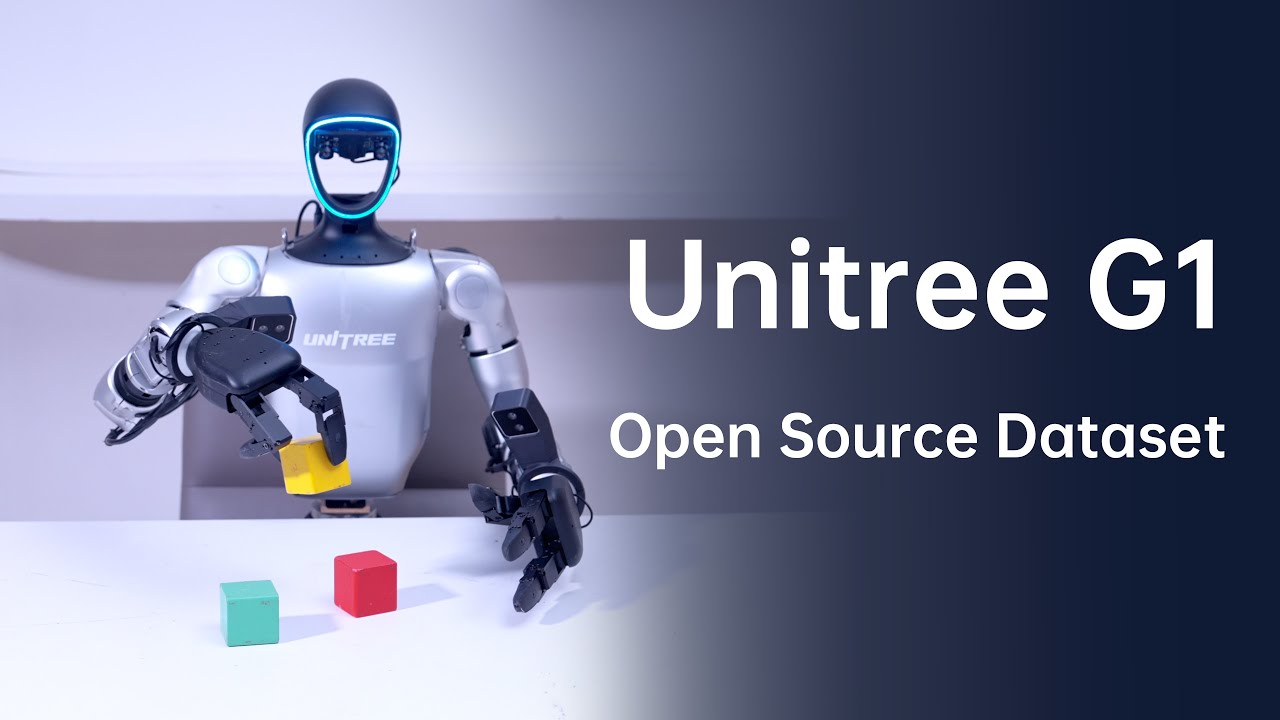
G1 (29DoF) + Dex3-1 |
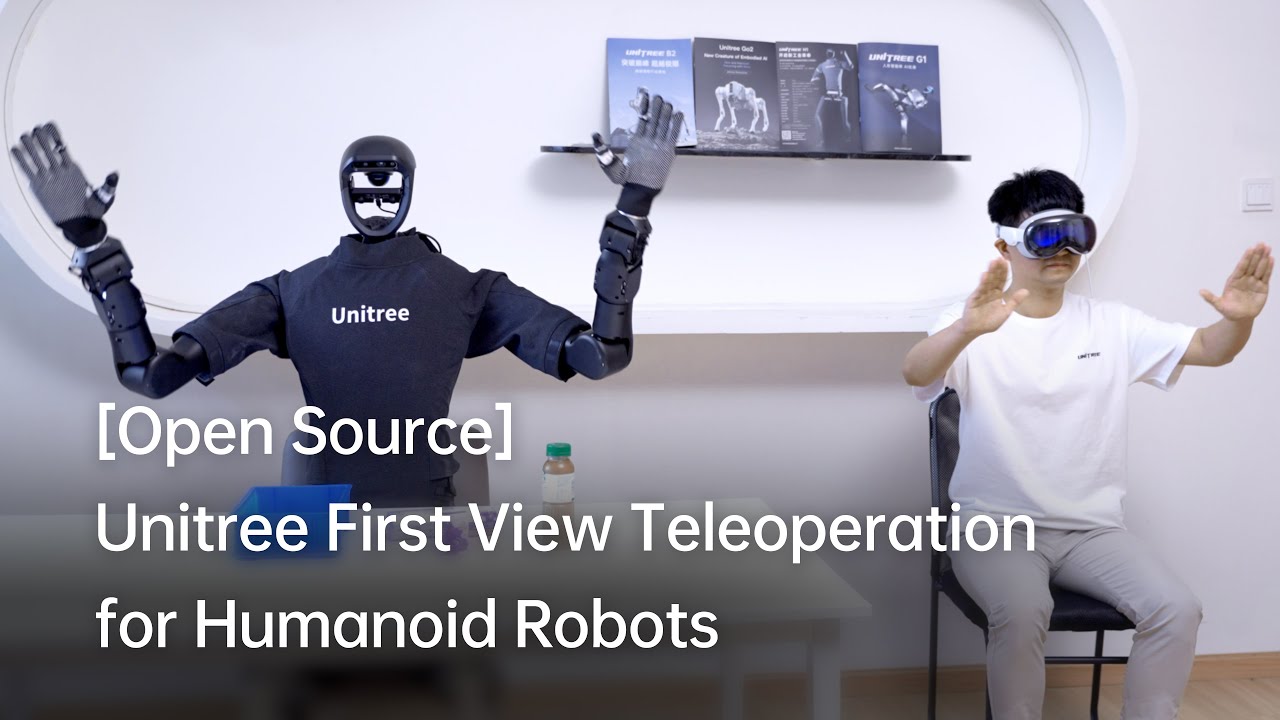
H1_2 (Arm 7DoF) |
🔖 Release Note
🏷️ v1.2
- Upgrade the Dex1_1 gripper control code to be compatible with the dex1_1 service driver.
🏷️ v1.1
- Added support for a new end-effector type:
brainco, which refers to the Brain Hand developed by BrainCo. - Changed the DDS domain ID to
1in simulation mode to prevent conflicts during physical deployment. - Fixed an issue where the default frequency was set too high.
🏷️ v1.0 (newvuer)
-
Upgraded the Vuer library to version v0.0.60, expanding XR device support to two modes: hand tracking and controller tracking. The project has been renamed from
avp_teleoperatetoxr_teleoperateto better reflect its broader capabilities.Devices tested include: Apple Vision Pro, Meta Quest 3 (with controllers), and PICO 4 Ultra Enterprise (with controllers).
-
Modularized parts of the codebase and integrated Git submodules (
git submodule) to improve code clarity and maintainability. -
Introduced headless, motion control, and simulation modes. Startup parameter configuration has been streamlined for ease of use (see Section 2.2). The simulation mode enables environment validation and hardware failure diagnostics.
-
Changed the default hand retargeting algorithm from Vector to DexPilot, enhancing the precision and intuitiveness of fingertip pinching interactions.
-
Various other improvements and optimizations.
🏷️ v0.5 (oldvuer)
- The repository was named
avp_teleoperatein this version. - Supported robot included:
G1_29,G1_23,H1_2, andH1. - Supported end-effectors included:
dex3,dex1(gripper), andinspire1. - Only supported hand tracking mode for XR devices (using Vuer version v0.0.32RC7). Controller tracking mode was not supported.
- Data recording mode was available.
0. 📖 Introduction
This repository implements teleoperation control of a Unitree humanoid robot using XR (Extended Reality) devices (such as Apple Vision Pro, PICO 4 Ultra Enterprise, or Meta Quest 3).
Here are the required devices and wiring diagram,
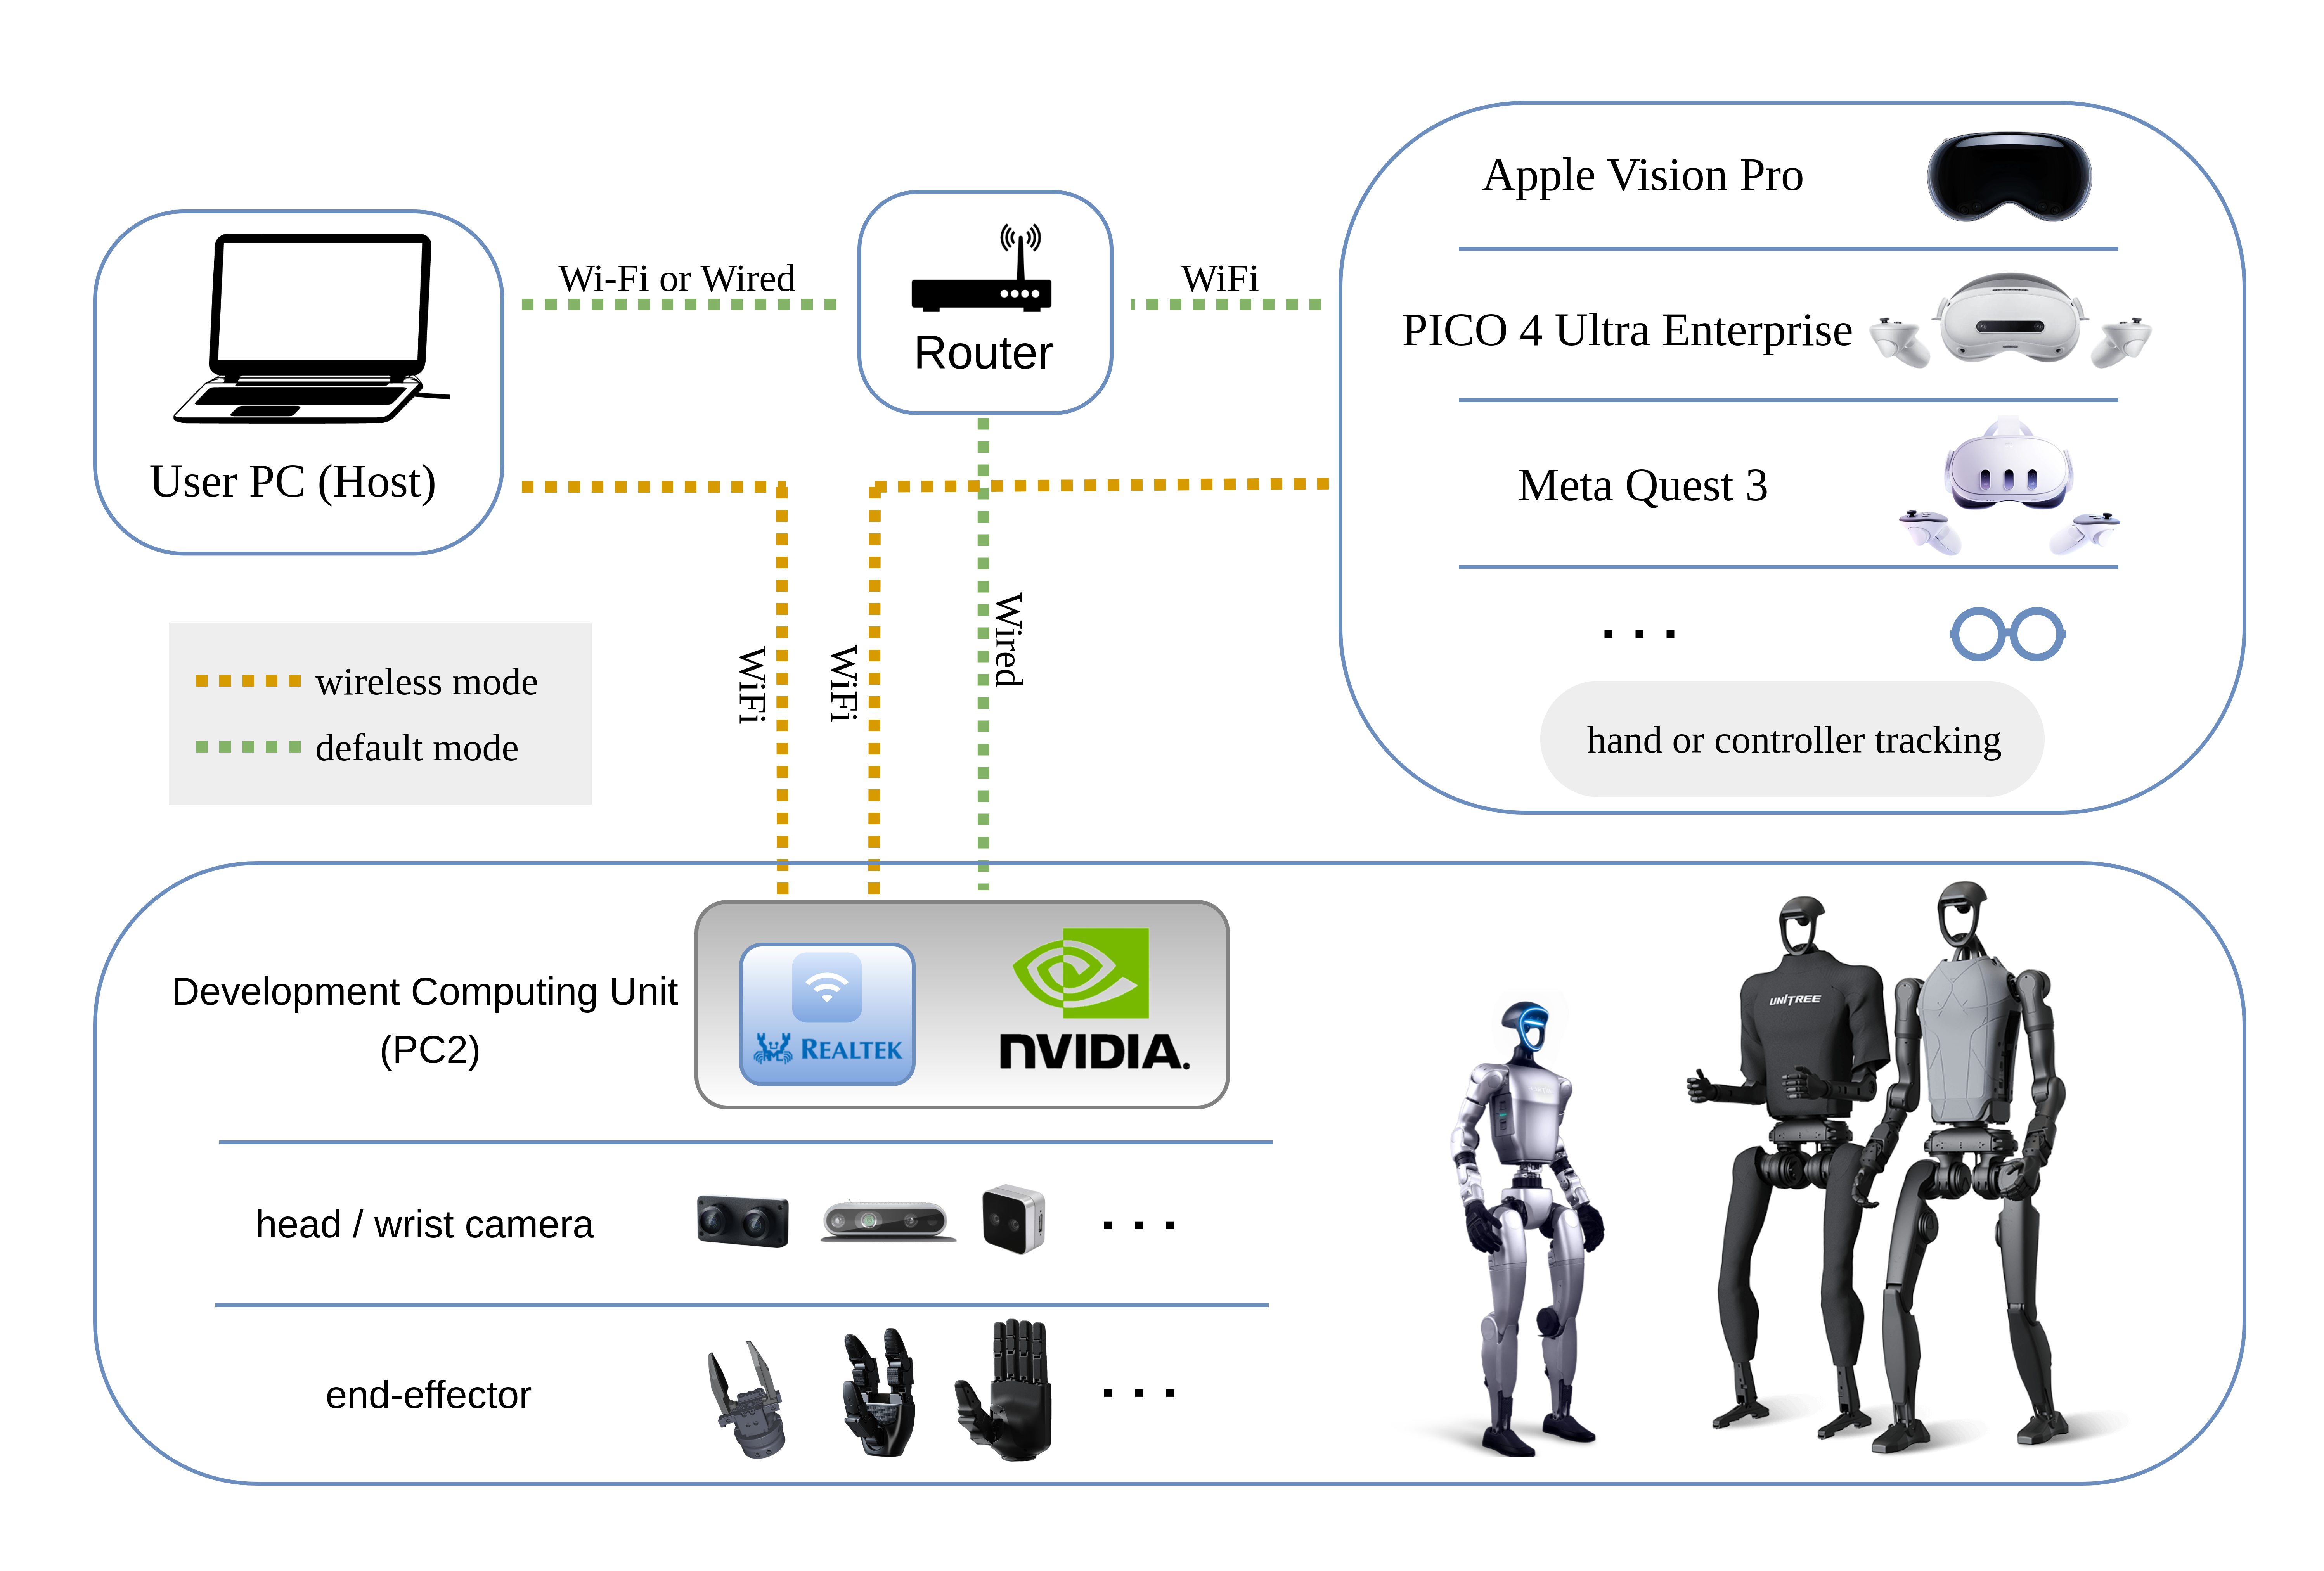
The currently supported devices in this repository:
| 🤖 Robot | ⚪ Status |
|---|---|
| G1 (29 DoF) | ✅ Complete |
| G1 (23 DoF) | ✅ Complete |
| H1 (4‑DoF arm) | ✅ Complete |
| H1_2 (7‑DoF arm) | ✅ Complete |
| Dex1‑1 gripper | ✅ Complete |
| Dex3‑1 dexterous hand | ✅ Complete |
| Inspire dexterous hand | ✅ Complete |
| BrainCo dexterous hand | ✅ Complete |
| ··· | ··· |
1. 📦 Installation
We tested our code on Ubuntu 20.04 and Ubuntu 22.04, other operating systems may be configured differently. This document primarily describes the default mode.
For more information, you can refer to Official Documentation and OpenTeleVision.
1.1 📥 basic
# Create a conda environment
(base) unitree@Host:~$ conda create -n tv python=3.10 pinocchio=3.1.0 numpy=1.26.4 -c conda-forge
(base) unitree@Host:~$ conda activate tv
# Clone this repo
(tv) unitree@Host:~$ git clone https://github.com/unitreerobotics/xr_teleoperate.git
(tv) unitree@Host:~$ cd xr_teleoperate
# Shallow clone submodule
(tv) unitree@Host:~/xr_teleoperate$ git submodule update --init --depth 1
# Install televuer submodule
(tv) unitree@Host:~/xr_teleoperate$ cd teleop/televuer
(tv) unitree@Host:~/xr_teleoperate/teleop/televuer$ pip install -e .
# Generate the certificate files required for televuer submodule
(tv) unitree@Host:~/xr_teleoperate/teleop/televuer$ openssl req -x509 -nodes -days 365 -newkey rsa:2048 -keyout key.pem -out cert.pem
# Install dex-retargeting submodule
(tv) unitree@Host:~/xr_teleoperate/teleop/televuer$ cd ../robot_control/dex-retargeting/
(tv) unitree@Host:~/xr_teleoperate/teleop/robot_control/dex-retargeting$ pip install -e .
# Install additional dependencies required by this repo
(tv) unitree@Host:~/xr_teleoperate/teleop/robot_control/dex-retargeting$ cd ../../../
(tv) unitree@Host:~/xr_teleoperate$ pip install -r requirements.txt
1.2 🕹️ unitree_sdk2_python
# Install unitree_sdk2_python library which handles communication with the robot
(tv) unitree@Host:~$ git clone https://github.com/unitreerobotics/unitree_sdk2_python.git
(tv) unitree@Host:~$ cd unitree_sdk2_python
(tv) unitree@Host:~/unitree_sdk2_python$ pip install -e .
Note 1: For
xr_teleoperateversions v1.1 and above, please ensure that theunitree_sdk2_pythonrepository is checked out to a commit equal to or newer than 404fe44d76f705c002c97e773276f2a8fefb57e4.Note 2: The unitree_dds_wrapper in the original h1_2 branch was a temporary version. It has now been fully migrated to the official Python-based control and communication library: unitree_sdk2_python.
Note 3: All identifiers in front of the command are meant for prompting: Which device and directory the command should be executed on.
In the Ubuntu system's
~/.bashrcfile, the default configuration is:PS1='${debian_chroot:+($debian_chroot)}\u@\h:\w\$ 'Taking the command
(tv) unitree@Host:~$ pip install meshcatas an example:
(tv)Indicates the shell is in the conda environment namedtv.unitree@Host:~Shows the user\uunitreeis logged into the device\hHost, with the current working directory\was$HOME.$shows the current shell is Bash (for non-root users).pip install meshcatis the commandunitreewants to execute onHost.You can refer to Harley Hahn's Guide to Unix and Linux and Conda User Guide to learn more.
2. 💻 Simulation Deployment
2.1 📥 Environment Setup
First, install unitree_sim_isaaclab. Follow that repo’s README.
Then launch the simulation with a G1(29 DoF) and Dex3 hand configuration:
(base) unitree@Host:~$ conda activate unitree_sim_env
(unitree_sim_env) unitree@Host:~$ cd ~/unitree_sim_isaaclab
(unitree_sim_env) unitree@Host:~/unitree_sim_isaaclab$ python sim_main.py --device cpu --enable_cameras --task Isaac-PickPlace-Cylinder-G129-Dex3-Joint --enable_dex3_dds --robot_type g129
💥💥💥 NOTICE❗
After simulation starts, click once in the window to activate it.
The terminal will show:
controller started, start main loop...
Here is the simulation GUI:
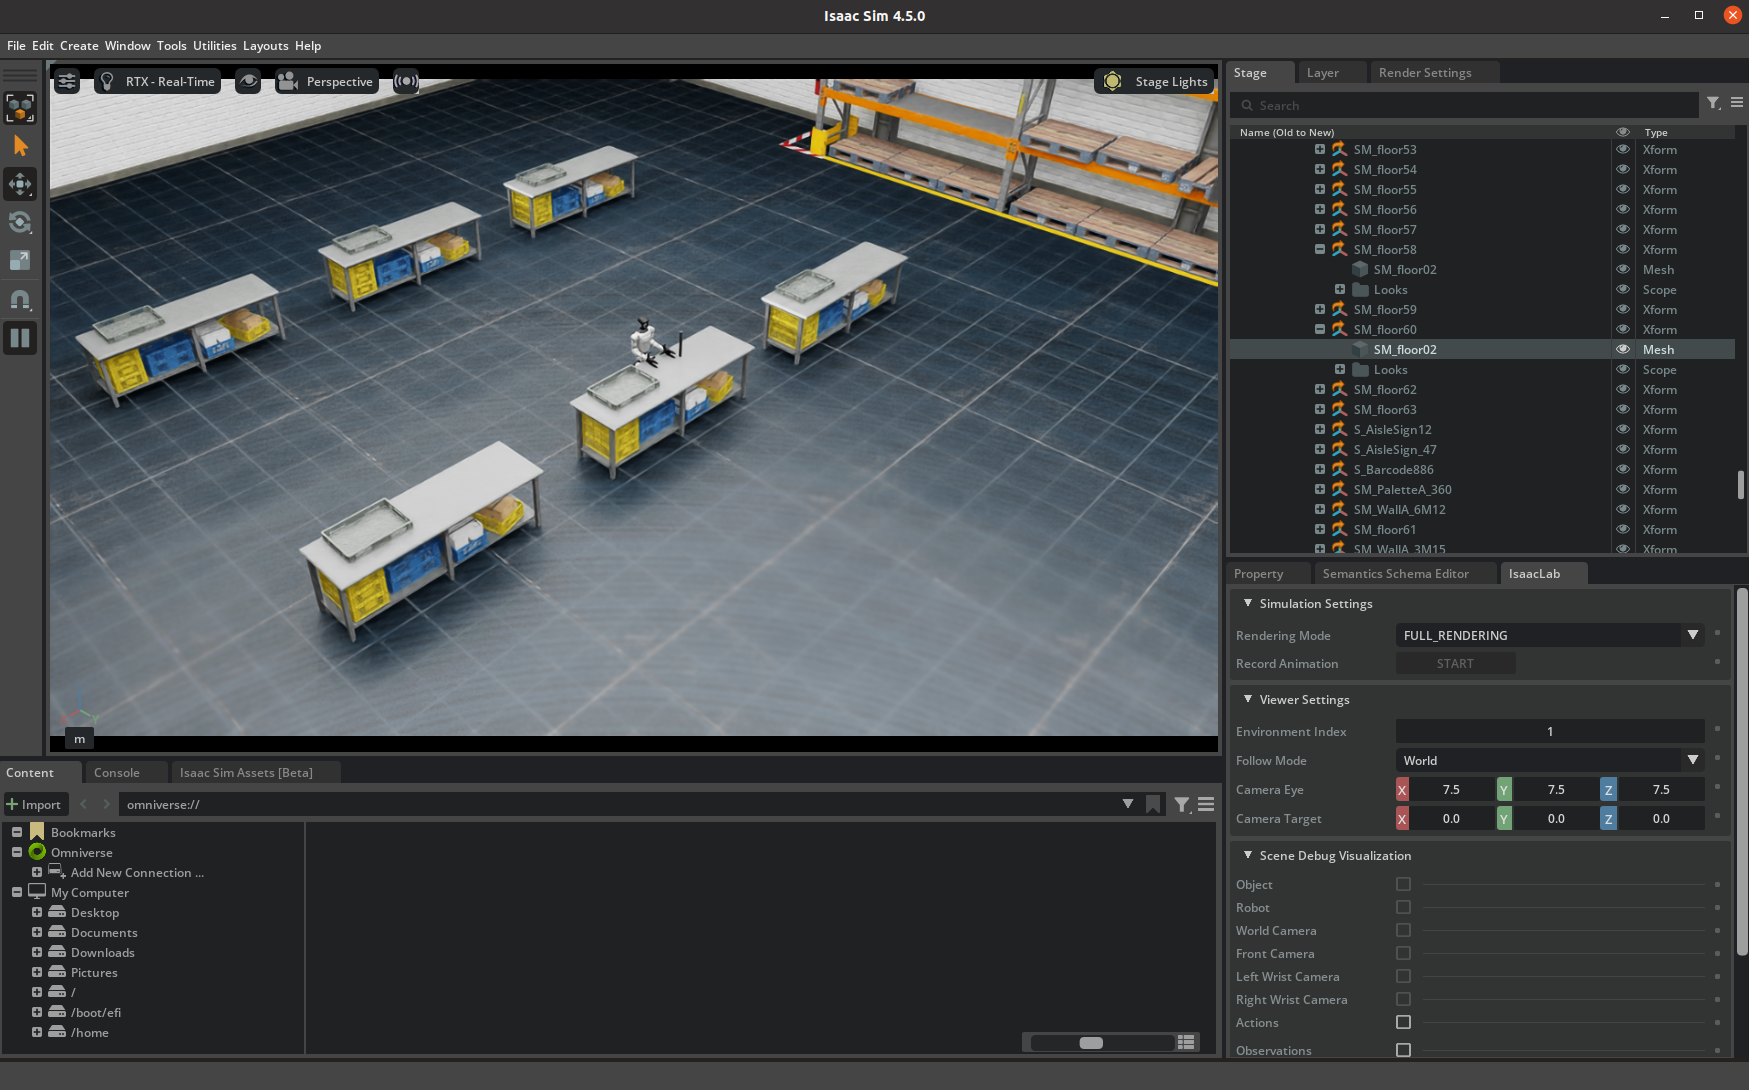
2.2 🚀 Launch
This program supports XR control of a physical robot or in simulation. Choose modes with command-line arguments:
- Basic control parameters
| ⚙️ Parameter | 📜 Description | 🔘 Options | 📌 Default |
|---|---|---|---|
--xr-mode |
Choose XR input mode | hand (hand tracking)controller (controller tracking) |
hand |
--arm |
Choose robot arm type (see 0. 📖 Introduction) | G1_29G1_23H1_2H1 |
G1_29 |
--ee |
Choose end-effector (see 0. 📖 Introduction) | dex1dex3inspire1brainco |
none |
- Mode flags
| ⚙️ Flag | 📜 Description |
|---|---|
--record |
Enable data recording After pressing r to start, press s to start/stop saving an episode. Can repeat. |
--motion |
Enable motion mode After enabling this mode, the teleoperation program can run alongside the robot's motion control. In hand tracking mode, you can use the R3 Controller to control the robot's walking behavior; in controller tracking mode, you can also use controllers to control the robot’s movement. |
--headless |
Run without GUI (for headless PC2 deployment) |
--sim |
Enable simulation mode |
Assuming hand tracking with G1(29 DoF) + Dex3 in simulation with recording:
(tv) unitree@Host:~$ cd ~/xr_teleoperate/teleop/
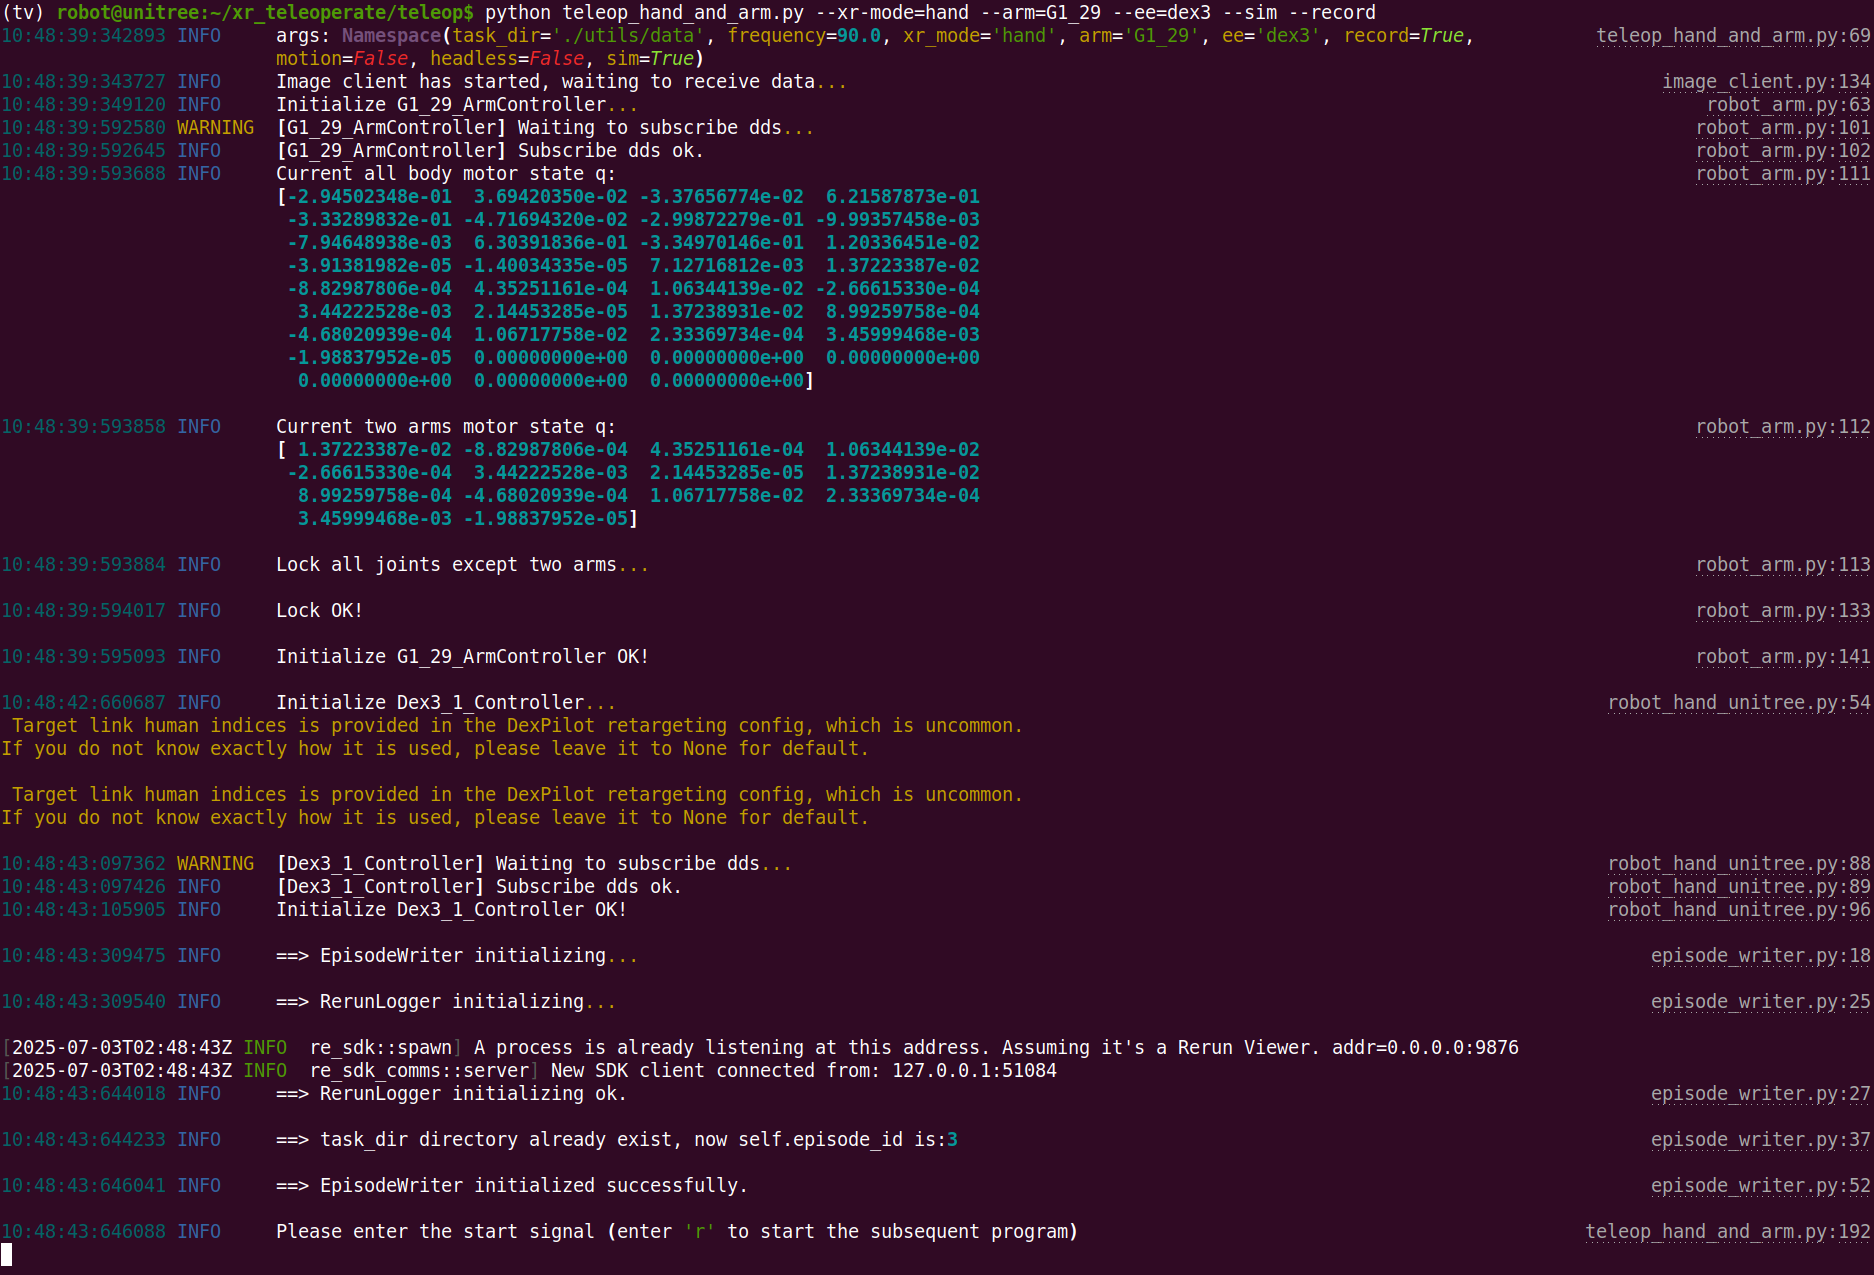
(tv) unitree@Host:~/xr_teleoperate/teleop/$ python teleop_hand_and_arm.py --xr-mode=hand --arm=G1_29 --ee=dex3 --sim --record
# Simplified (defaults apply):
(tv) unitree@Host:~/xr_teleoperate/teleop/$ python teleop_hand_and_arm.py --ee=dex3 --sim --record
After the program starts, the terminal shows:
Next steps:
-
Wear your XR headset (e.g. Apple Vision Pro, PICO4, etc.)
-
Connect to the corresponding Wi‑Fi
-
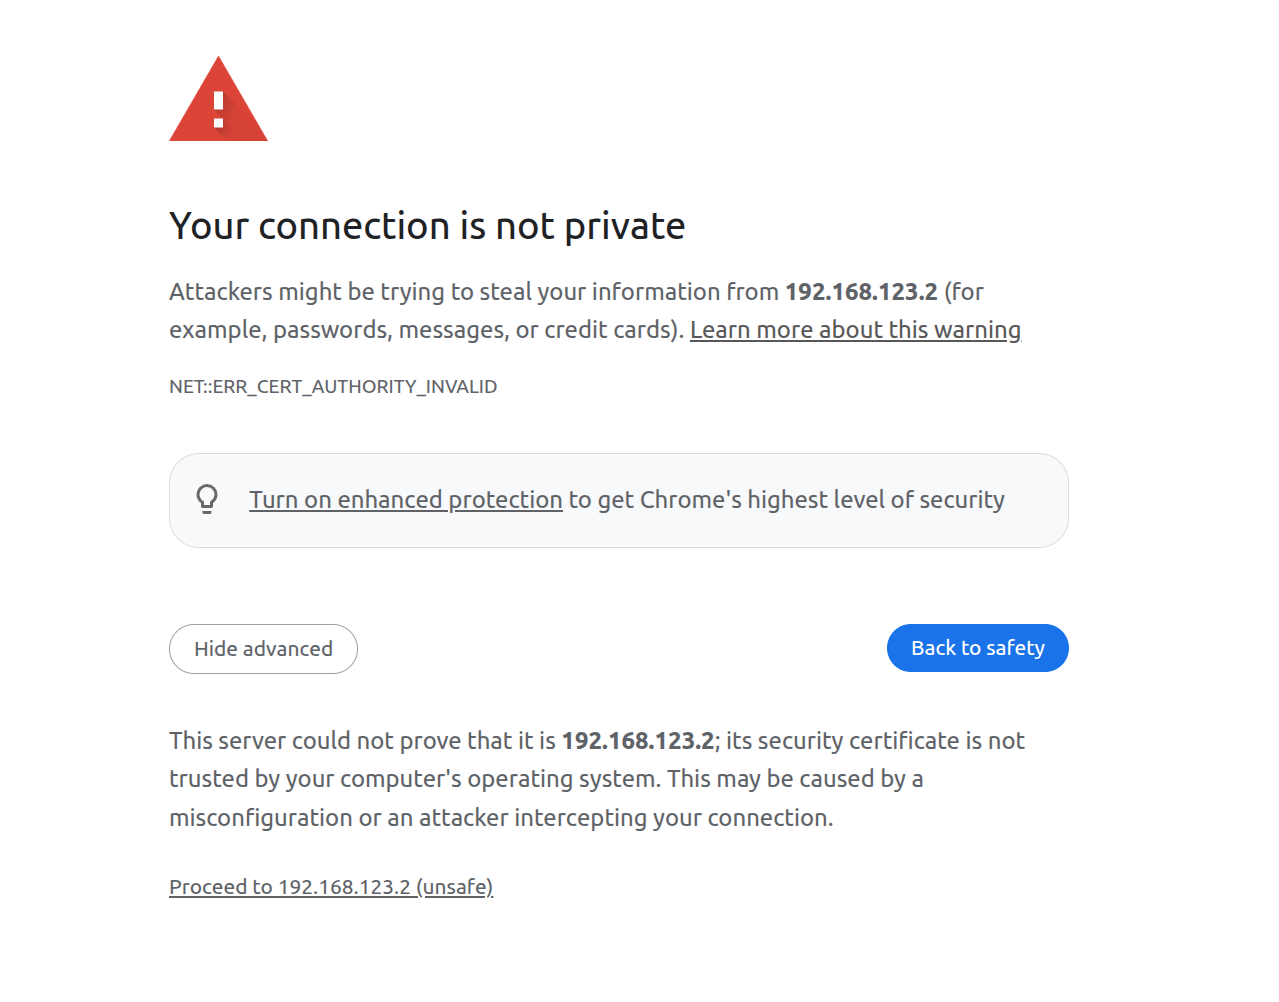
Open a browser (e.g. Safari or PICO Browser) and go to:
https://192.168.123.2:8012?ws=wss://192.168.123.2:8012Note 1: This IP must match your Host IP (check with
ifconfig).Note 2: You may see a warning page. Click Advanced, then Proceed to IP (unsafe).
-
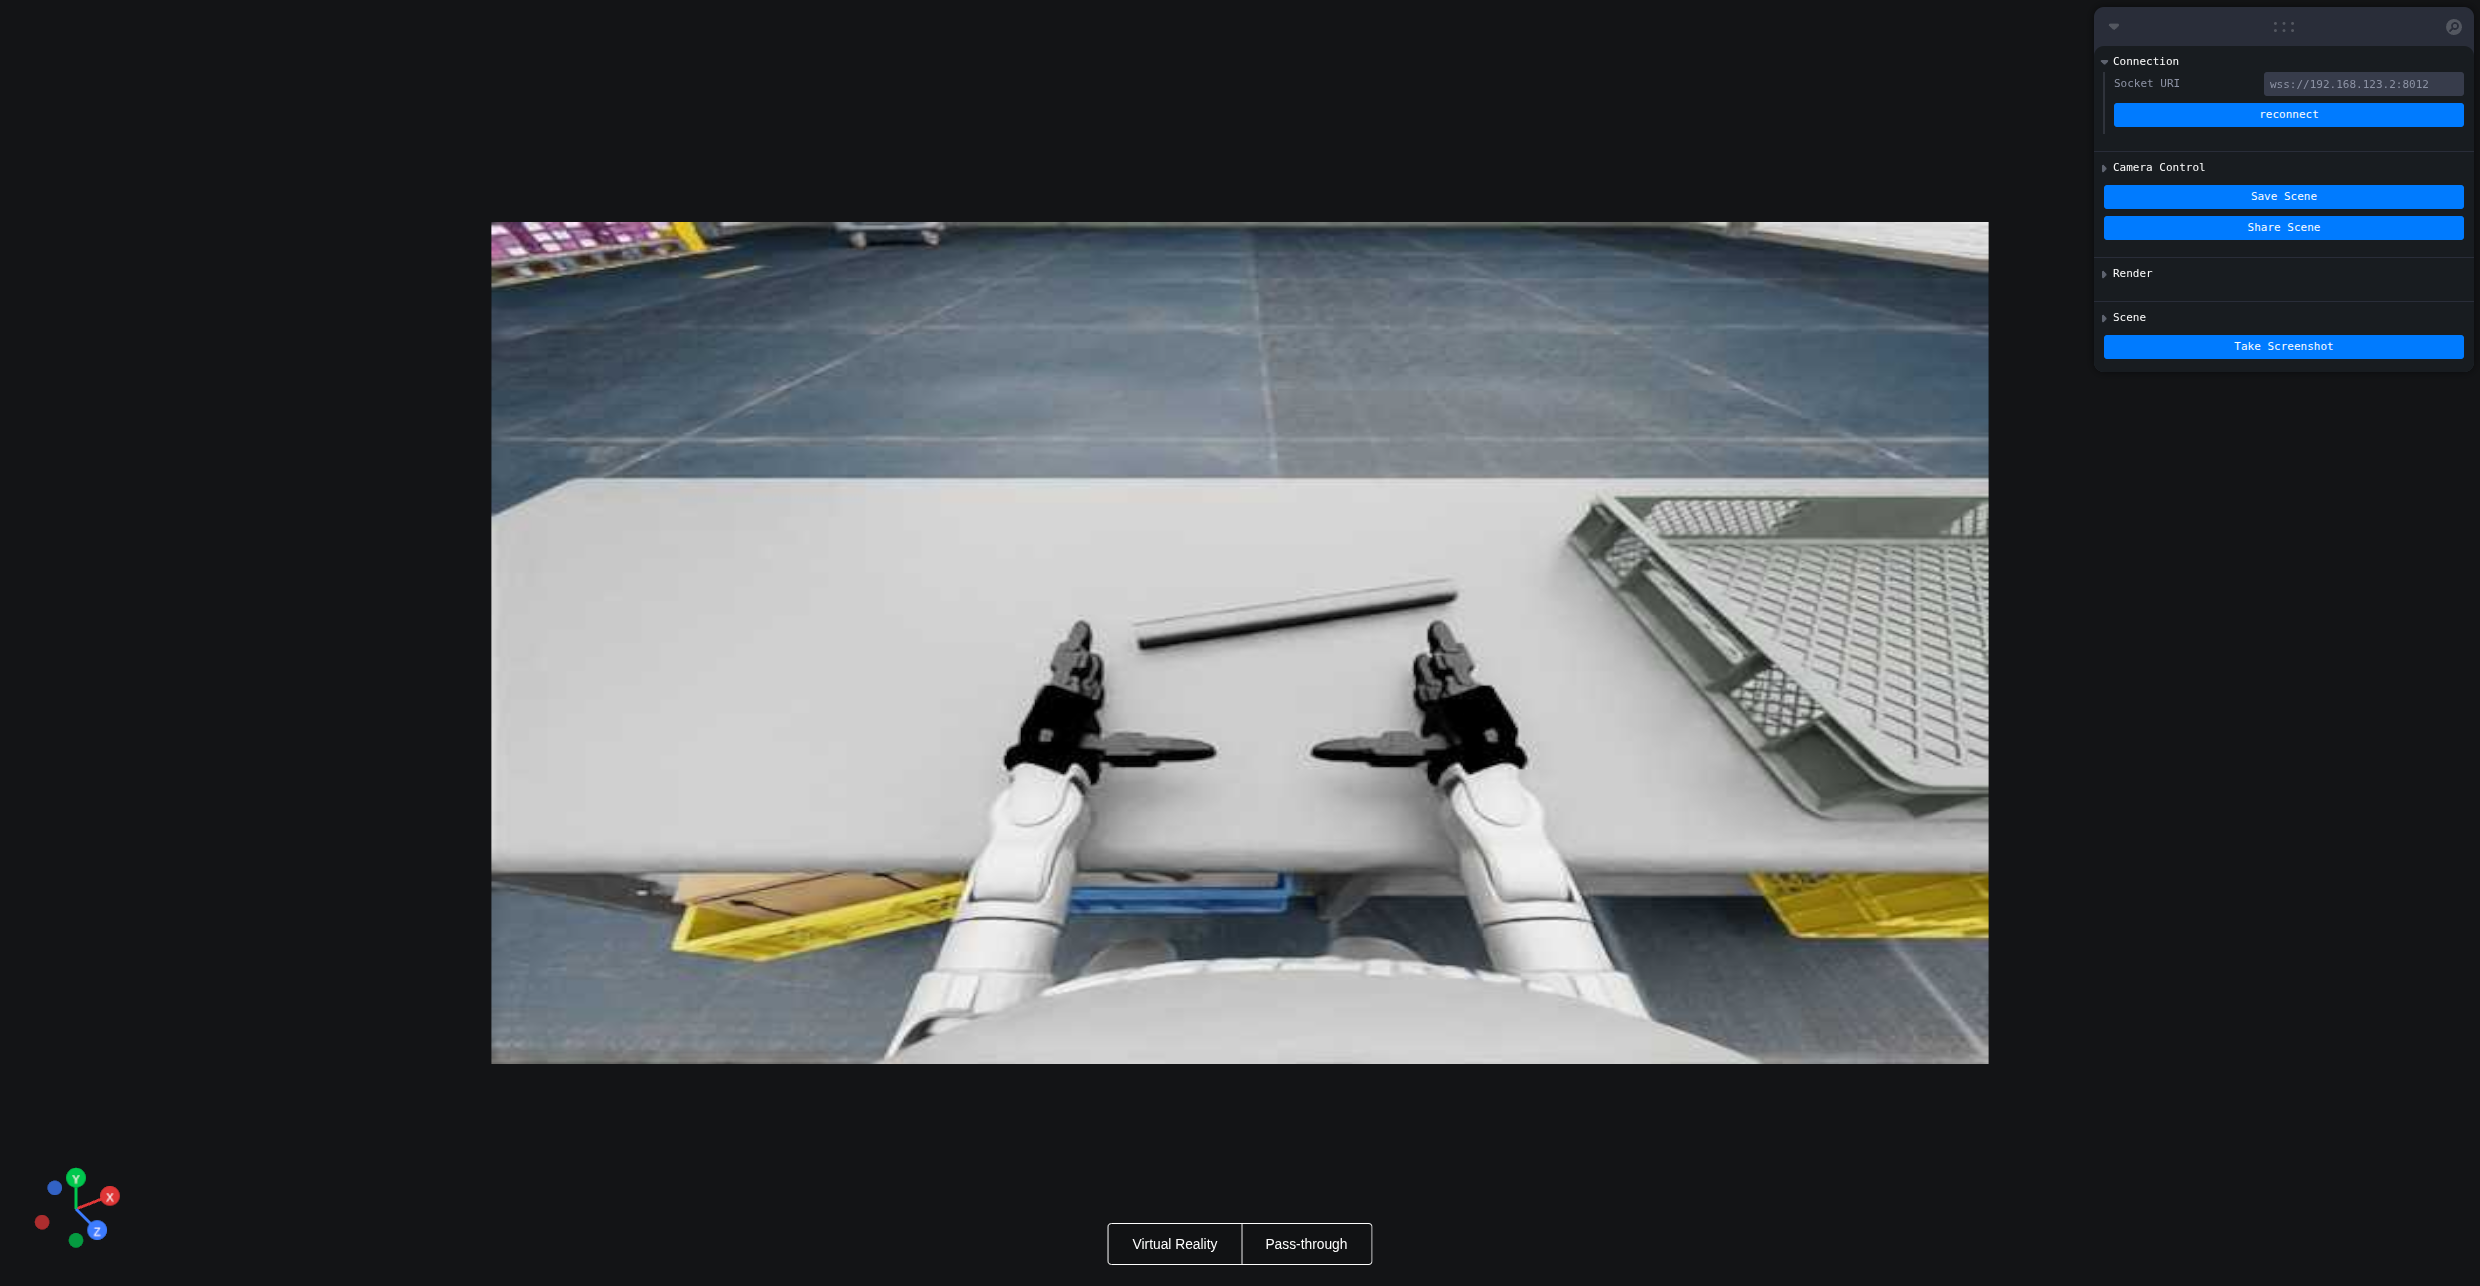
In the Vuer web, click Virtual Reality. Allow all prompts to start the VR session.
-
You’ll see the robot’s first-person view in the headset. The terminal prints connection info:
websocket is connected. id:dbb8537d-a58c-4c57-b49d-cbb91bd25b90 default socket worker is up, adding clientEvents Uplink task running. id:dbb8537d-a58c-4c57-b49d-cbb91bd25b90 -
Align your arm to the robot’s initial pose to avoid sudden movements at start:

-
Press r in the terminal to begin teleoperation. You can now control the robot arm and dexterous hand.
-
During teleoperation, press s to start recording; press s again to stop and save. Repeatable process.
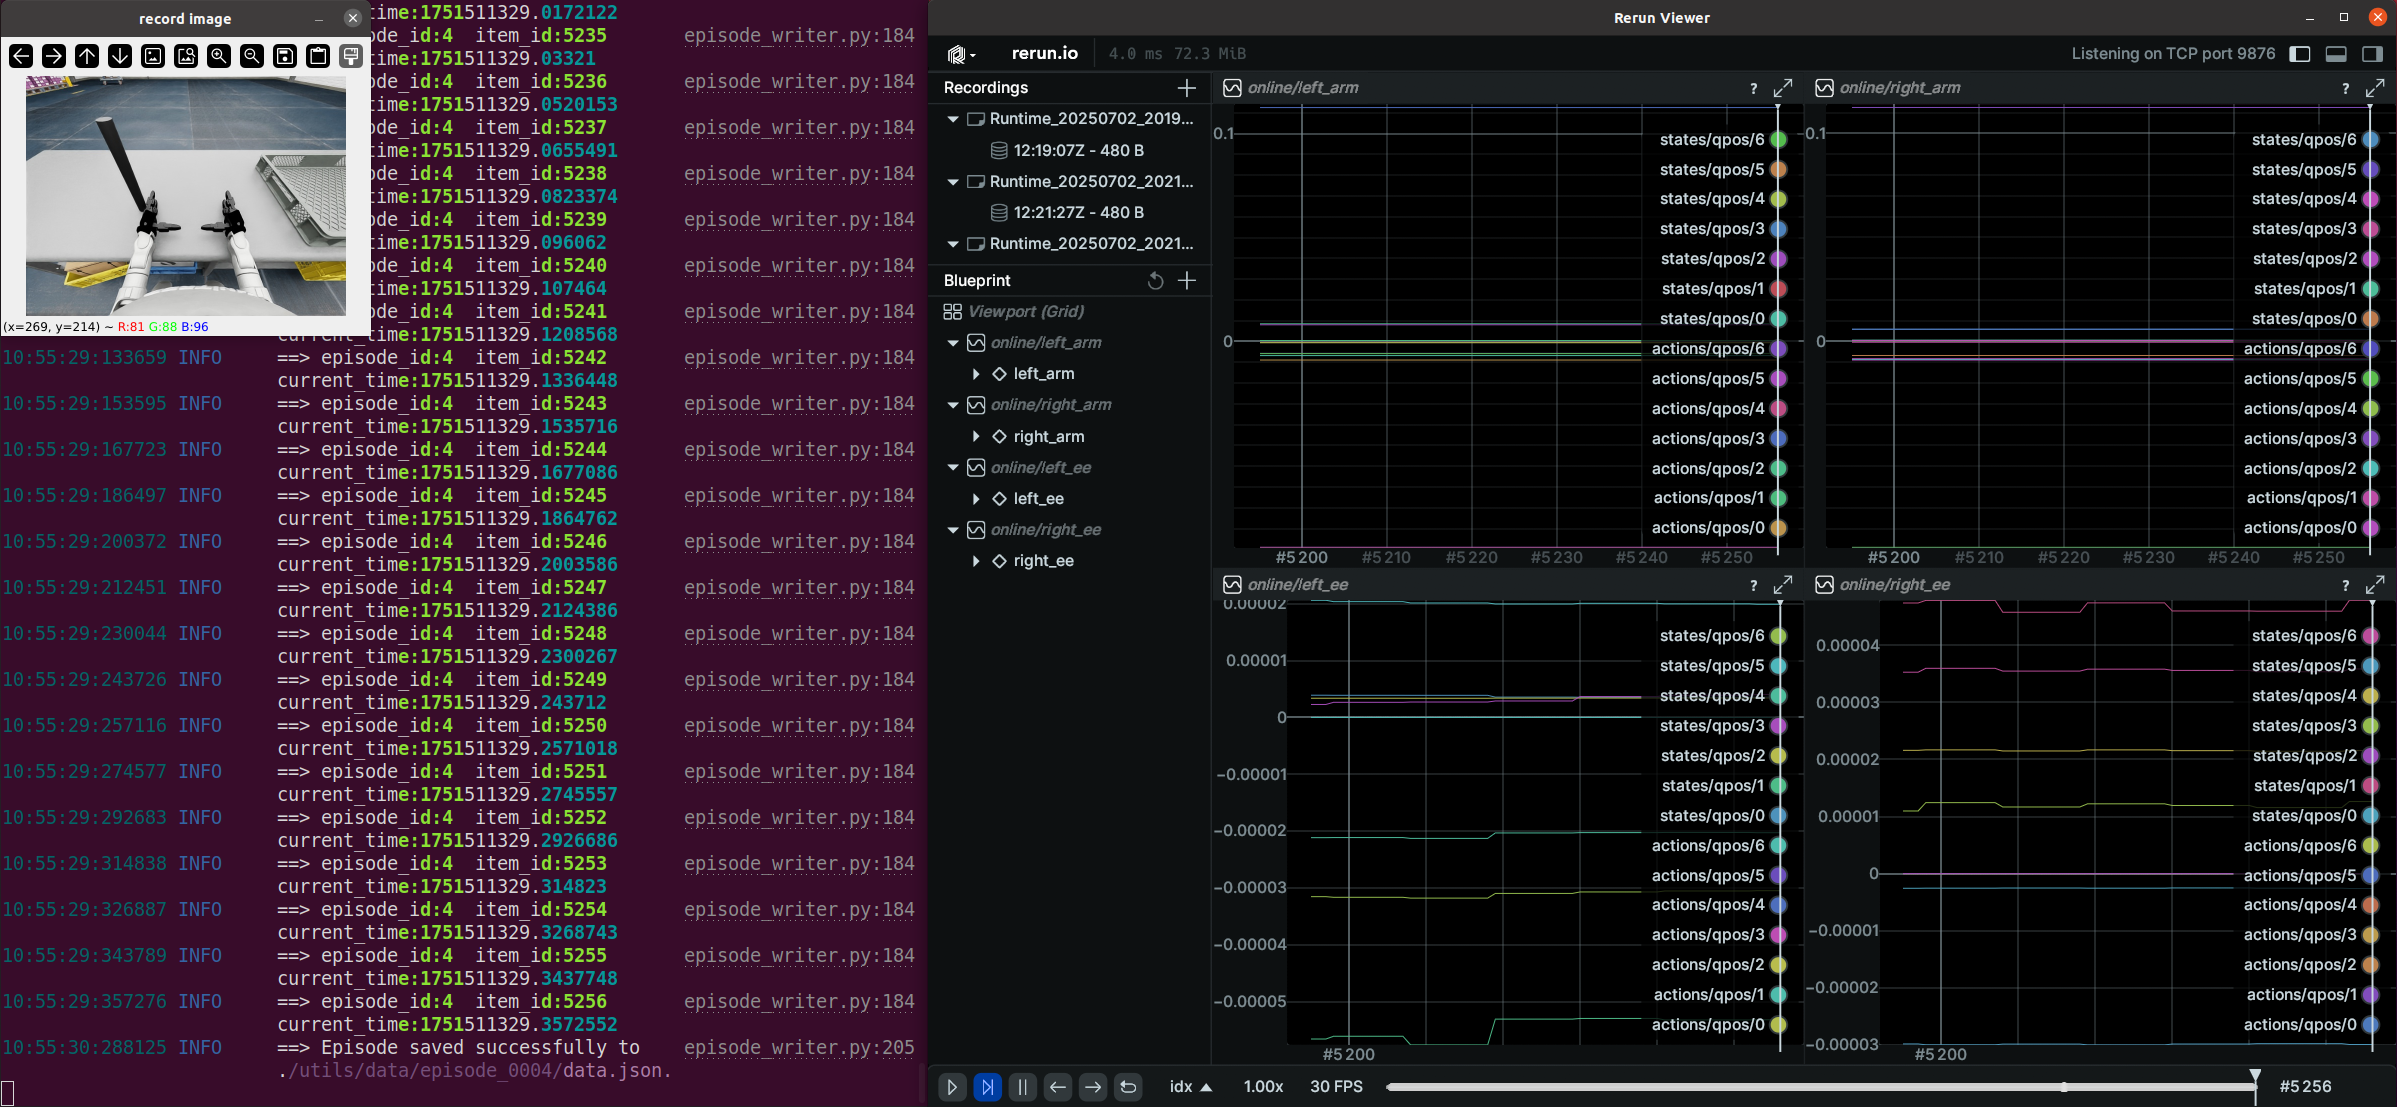
Note 1: Recorded data is stored in
xr_teleoperate/teleop/utils/databy default, with usage instructions at this repo: unitree_IL_lerobot.Note 2: Please pay attention to your disk space size during data recording.
2.3 🔚 Exit
Press q in the terminal (or “record image” window) to quit.
3. 🤖 Physical Deployment
Physical deployment steps are similar to simulation, with these key differences:
3.1 🖼️ Image Service
In the simulation environment, the image service is automatically enabled. For physical deployment, you need to manually start the image service based on your specific camera hardware. The steps are as follows:
Copy image_server.py in the xr_teleoperate/teleop/image_server directory to the Development Computing Unit PC2 of Unitree Robot (G1/H1/H1_2/etc.),
# p.s. You can transfer image_server.py to PC2 via the scp command and then use ssh to remotely login to PC2 to execute it.
# Assuming the IP address of the development computing unit PC2 is 192.168.123.164, the transmission process is as follows:
# log in to PC2 via SSH and create the folder for the image server
(tv) unitree@Host:~$ ssh unitree@192.168.123.164 "mkdir -p ~/image_server"
# Copy the local image_server.py to the ~/image_server directory on PC2
(tv) unitree@Host:~$ scp ~/xr_teleoperate/teleop/image_server/image_server.py unitree@192.168.123.164:~/image_server/
and execute the following command in the PC2:
# p.s. Currently, this image transmission program supports two methods for reading images: OpenCV and Realsense SDK. Please refer to the comments in the `ImageServer` class within `image_server.py` to configure your image transmission service according to your camera hardware.
# Now located in Unitree Robot PC2 terminal
unitree@PC2:~/image_server$ python image_server.py
# You can see the terminal output as follows:
# {'fps': 30, 'head_camera_type': 'opencv', 'head_camera_image_shape': [480, 1280], 'head_camera_id_numbers': [0]}
# [Image Server] Head camera 0 resolution: 480.0 x 1280.0
# [Image Server] Image server has started, waiting for client connections...
After image service is started, you can use image_client.py in the Host terminal to test whether the communication is successful:
(tv) unitree@Host:~/xr_teleoperate/teleop/image_server$ python image_client.py
3.2 ✋ Inspire Hand Service (optional)
Note 1: Skip this if your config does not use the Inspire hand.
Note 2: For G1 robot with Inspire DFX hand, related issue #46.
Note 3: For Inspire FTP hand, related issue #48.
First, use this URL: DFX_inspire_service to clone the dexterous hand control interface program. And Copy it to PC2 of Unitree robots.
On Unitree robot's PC2, execute command:
unitree@PC2:~$ sudo apt install libboost-all-dev libspdlog-dev
# Build project
unitree@PC2:~$ cd DFX_inspire_service && mkdir build && cd build
unitree@PC2:~/DFX_inspire_service/build$ cmake ..
unitree@PC2:~/DFX_inspire_service/build$ make -j6

# (For unitree g1) Terminal 1.
unitree@PC2:~/DFX_inspire_service/build$ sudo ./inspire_g1
# or (For unitree h1) Terminal 1.
unitree@PC2:~/DFX_inspire_service/build$ sudo ./inspire_h1 -s /dev/ttyUSB0

# Terminal 2. Run example
unitree@PC2:~/DFX_inspire_service/build$ ./hand_example
If two hands open and close continuously, it indicates success. Once successful, close the ./hand_example program in Terminal 2.
3.3 ✋ BrainCo Hand Service (Optional)
Please refer to the official documentation for setup instructions.
After installation, you need to manually start the services for both dexterous hands. Example commands are shown below (note: the serial port names may vary depending on your system):
# Terminal 1.
sudo ./brainco_hand --id 126 --serial /dev/ttyUSB1
# Terminal 2.
sudo ./brainco_hand --id 127 --serial /dev/ttyUSB2
3.4 🚀 Launch
- Everyone must keep a safe distance from the robot to prevent any potential danger!
- Please make sure to read the Official Documentation at least once before running this program.
- Without
--motion, always make sure that the robot has entered debug mode (L2+R2) to stop the motion control program, this will avoid potential command conflict problems.- To use motion mode (with
--motion), ensure the robot is in control mode (via R3 remote).- In motion mode:
- Right controller A = Exit teleop
- Both joysticks pressed = soft emergency stop (switch to damping mode)
- Left joystick = drive directions;
- right joystick = turning;
- max speed is limited in the code.
Same as simulation but follow the safety warnings above.
3.5 🔚 Exit
To avoid damaging the robot, it is recommended to position the robot's arms close to the initial pose before pressing q to exit.
In Debug Mode: After pressing the exit key, both arms will return to the robot's initial pose within 5 seconds, and then the control will end.
In Motion Mode: After pressing the exit key, both arms will return to the robot's motion control pose within 5 seconds, and then the control will end.
Same as simulation but follow the safety warnings above.
4. 🗺️ Codebase Overview
xr_teleoperate/
│
├── assets                    [Storage of robot URDF-related files]
│
├── hardware                  [3D‑printed hardware modules]
│
├── teleop
│   ├── image_server
│   │     ├── image_client.py      [Used to receive image data from the robot image server]
│   │     ├── image_server.py      [Capture images from cameras and send via network (Running on robot's Development Computing Unit PC2)]
│   │
│   ├── televuer
│   │      ├── src/televuer
│   │         ├── television.py       [captures XR devices's head, wrist, hand/controller data]
│   │         ├── tv_wrapper.py       [Post-processing of captured data]
│   │      ├── test
│   │         ├── _test_television.py [test for television.py]
│   │         ├── _test_tv_wrapper.py [test for tv_wrapper.py]
│   │
│   ├── robot_control
│   │      ├── src/dex-retargeting [Dexterous hand retargeting algorithm library]
│   │      ├── robot_arm_ik.py     [Inverse kinematics of the arm]
│   │      ├── robot_arm.py        [Control dual arm joints and lock the others]
│   │      ├── hand_retargeting.py [Dexterous hand retargeting algorithm library Wrapper]
│   │      ├── robot_hand_inspire.py  [Control inspire hand joints]
│   │      ├── robot_hand_unitree.py  [Control unitree hand joints]
│   │
│   ├── utils
│   │      ├── episode_writer.py          [Used to record data for imitation learning]
│   │      ├── weighted_moving_filter.py  [For filtering joint data]
│   │      ├── rerun_visualizer.py        [For visualizing data during recording]
│   │
│   └── teleop_hand_and_arm.py    [Startup execution code for teleoperation]
5. 🛠️ Hardware
5.1 📋 Parts List
| Item | Quantity | Link(s) | Remarks |
|---|---|---|---|
| humanoid robot | 1 | https://www.unitree.com | With development computing unit |
| XR device | 1 | https://www.apple.com/apple-vision-pro/ https://www.meta.com/quest/quest-3 https://www.picoxr.com/products/pico4-ultra-enterprise |
|
| Router | 1 | Required for default mode; wireless mode not need. | |
| User PC | 1 | In simulation mode, please use the officially recommended hardware resources for deployment. | |
| Head stereo camera | 1 | [For reference only] http://e.tb.cn/h.TaZxgkpfWkNCakg?tk=KKz03Kyu04u | For robot head view |
| Head camera mount | 1 | https://github.com/unitreerobotics/xr_teleoperate/blob/g1/hardware/head_stereo_camera_mount.STEP | For mounting head stereo camera |
| Intel RealSense D405 camera | 2 | https://www.intelrealsense.com/depth-camera-d405/ | For wrist |
| Wrist ring mount | 2 | https://github.com/unitreerobotics/xr_teleoperate/blob/g1/hardware/wrist_ring_mount.STEP | Used with wrist camera mount |
| Left wrist D405 mount | 1 | https://github.com/unitreerobotics/xr_teleoperate/blob/g1/hardware/left_wrist_D405_camera_mount.STEP | For mounting left wrist RealSense D405 camera |
| Right wrist D405 mount | 1 | https://github.com/unitreerobotics/xr_teleoperate/blob/g1/hardware/right_wrist_D405_camera_mount.STEP | For mounting right wrist RealSense D405 camera |
| M3-1 hex nuts | 4 | [For reference only] https://a.co/d/1opqtOr | For Wrist fastener |
| M3x12 screws | 4 | [For reference only] https://amzn.asia/d/aU9NHSf | For Wrist fastener |
| M3x6 screws | 4 | [For reference only] https://amzn.asia/d/0nEz5dJ | For Wrist fastener |
| M4x14 screws | 2 | [For reference only] https://amzn.asia/d/cfta55x | For head fastener |
| M2x4 self‑tapping screws | 4 | [For reference only] https://amzn.asia/d/1msRa5B | For head fastener |
Note: The bolded items are essential equipment for teleoperation tasks, while the other items are optional equipment for recording datasets.
5.2 🔨 Mounting Diagrams
| Item | Simulation | Real | ||
|---|---|---|---|---|
| Head |
|
|
|
|
| Wrist |
|
|
|
|


Note: The wrist ring mount should align with the seam of the robot's wrist, as shown by the red circle in the image.
6. 🙏 Acknowledgement
This code builds upon following open-source code-bases. Please visit the URLs to see the respective LICENSES:
- https://github.com/OpenTeleVision/TeleVision
- https://github.com/dexsuite/dex-retargeting
- https://github.com/vuer-ai/vuer
- https://github.com/stack-of-tasks/pinocchio
- https://github.com/casadi/casadi
- https://github.com/meshcat-dev/meshcat-python
- https://github.com/zeromq/pyzmq
- https://github.com/Dingry/BunnyVisionPro
- https://github.com/unitreerobotics/unitree_sdk2_python